Инструкция для Indesit 7OFIMS 20 K.A IX
 1
1 2
2 3
3 4
4 5
5 6
6 7
7 8
8 9
9 10
10 11
11 12
12 13
13 14
14 15
15 16
16 17
17 18
18 19
19 20
20 21
21 22
22 23
23 24
24
10
GB
Switching the appliance off
Disconnect your appliance from the electricity
supply before carrying out any work on it.
Cleaning the appliance
!
Never use steam cleaners or pressure cleaners on
the appliance.
• The stainless-steel or enamel-coated external
parts as well as the rubber seals may be cleaned
using a sponge that has been soaked in
lukewarm water and neutral soap. If these stains
are difficult to remove, use only specialised
products. After cleaning, rinse and dry
thoroughly. Do not use abrasive powders or
corrosive substances.
• Ideally, the inside of the oven should be cleaned
after each use, when it is still lukewarm. Use hot
water and detergent, rinse and dry with a soft
cloth. Do not use abrasive products.
• The accessories can be washed like everyday
crockery (even in your dishwasher).
Cleaning the oven door
Clean the glass part of the oven door using a
sponge and a non-abrasive cleaning product, then
dry thoroughly with a soft cloth. Do not use rough
abrasive material or sharp metal scrapers as these
could scratch the surface and cause the glass to
crack.
.
To clean more thoroughly, you can remove the oven
door.
1. Open the oven door fully
(
see diagram)
2. Lift up and turn the small
levers located on the two
hinges (
see diagram)
3. Grip the door on the two
external sides and close it
approximately half way. Then
pull the door towards you
lifting it out of its seat (
see
diagram).
To replace the door, reverse
this sequence.
Inspecting the seals
Check the door seals around the oven periodically. If
the seals are damaged, please contact your nearest
After-sales Service Centre (
see Assistance). We
recommend not using the oven until the seals have
been replaced.
Replacing the light bulb
To replace the oven light bulb:
1. Remove the glass cover of the lamp-holder.
2. Remove the light bulb and replace it with a similar
one: Wattage 25 W, cap E 14.
3. Replace the glass cover (
see diagram).
! Do not use the oven lamp as/for ambient lighting
Assistance
!
Never use the services of an unauthorised
technician.
Please have the following information handy:
• The type of problem encountered.
• The appliance model (Mod.).
• The serial number (S/N).
The latter two pieces of information can be found on
the data plate located on the appliance.
Maintenance and care
Оглавление инструкции
- Страница 1 из 25
Operating Instructions OVEN Contents GB English,1 RS 1 Warnings,2 Installation, 3-4 Positioning Electrical connections Data plate Description of the appliance, 5 Overall view Control panel Start-up and use, 6 Starting the oven Cooking modes, 7-8 7OFIM 20 K.A IX 7OFIMS 20K.A IX Cooking
- Страница 2 из 25
Warnings GB • WARNING: The appliance and its accessible parts become hot during use. • Care should be taken to avoid touching heating elements. • Children less than 8 years of age shall be kept away unless continuously supervised. This appliance can be used by children aged from 8 years and above
- Страница 3 из 25
Installation ! Before placing your new appliance into operation please read these operating instructions carefully. They contain important information for safe use, for installation and for care of the appliance. ! Please keep these operating instructions for future reference. Pass them on to
- Страница 4 из 25
GB Electrical connections ! Ovens equipped with a three-pole power supply cable are designed to operate with alternating current at the voltage and frequency indicated on the data plate located on the appliance (see below). Fitting the power supply cable L N 1. Open the terminal board by inserting
- Страница 5 из 25
Description of the appliance Overall view GB Control panel GRILL DRIPPING PAN GUIDES for the sliding racks position 5 position 4 position 3 position 2 position 1 Control panel Indicator light THERMOSTAT SELECTOR Knob THERMOSTAT Knob 5
- Страница 6 из 25
Start-up and use GB ! The first time you use your appliance, heat the empty oven with its door closed at its maximum temperature for at least half an hour. Ensure that the room is well ventilated before switching the oven off and opening the oven door. The appliance may produce a slightly
- Страница 7 из 25
Cooking modes Cooking modes Practical cooking advice ! A temperature value can be set for all cooking modes between 60°C and MAX, except for the GRILL programme, for which only the MAX power level is recommended. ! In the GRILL cooking mode, place the dripping pan in position 1 to collect cooking
- Страница 8 из 25
GB Cooking advice table Cooking modes Convection Oven Pastry Mode Foods Duck Roast veal or beef Pork roast Biscuits (short pastry) Tarts Lasagne Lamb Mackerel Plum -cake Cream puffs Sponge -cake Savoury pies Raised Cakes Tarts Fruit cakes Brioches Top oven Browning food to perfect cooking Grill
- Страница 9 из 25
Precautions and tips ! The appliance was designed and manufactured in compliance with international safety standards. The following warnings are provided for safety reasons and must be read carefully. General safety • The appliance was designed for domestic use inside the home and is not intended
- Страница 10 из 25
Maintenance and care GB Switching the appliance off 3. Grip the door on the two external sides and close it approximately half way. Then pull the door towards you lifting it out of its seat (see diagram). To replace the door, reverse this sequence. Disconnect your appliance from the electricity
- Страница 11 из 25
Руководство по эксплуатации ДУХОВОЙ ШКАФ Содержание GB English,1 RS Русский, 11 ВНИМАНИЕ,12 Монтаж, 13-14 Расположение Электрическое подсоединение Подсоединение к газопроводу Паспортная табличка Описание изделия, 15 Общий вид Панель управления Включение и эксплуатация, 16 Эксплуатация духового
- Страница 12 из 25
ВНИМАНИЕ • ВНИМАНИЕ: Данное изделие и его доступные комплектующие сильно нагреваются в процессе эксплуатации. • Будьте осторожны и не касайтесь нагревательных элементов. • Не разрешайте детям младше 8 лет приближаться к изделию без контроля. • Данное изделие может быть использовано детьми старше 8
- Страница 13 из 25
Монтаж ! Важно сохранить данное руководство для его последующих консультаций. В случае продажи, передачи изделия или при переезде на новое место жительства необходимо проверить, чтобы руководство оставалось вместе с изделием, для того чтобы его новый владелец мог ознакомиться с правилами
- Страница 14 из 25
RS L-Nи затем прикрепите провода под головками винтов, соблюдая цветовую маркировку Синий (N) Коричневый (L) Желто(см. зеленый схему). 3. Закрепите сетевой N кабель в специальном кабельном сальнике. 4. Закройте крышку зажимной коробки. L ! Изделие должно быть установлено таким образом, чтобы
- Страница 15 из 25
Описание изделия Общий вид RS Панель управления 15
- Страница 16 из 25
Включение и эксплуатация RS ! При первом включении духового шкафа рекомендуем прокалить его примерно в течение 30 минут при максимальной температуре с закрытой дверцей. Затем выключите духовой шкаф, откройте дверцу и проветрите помещение. Запах, который вы можете почувствовать, вызван испарением
- Страница 17 из 25
Программы Программы приготовления ! Для всех программ можно задать температуру от 60°C до МАКС кроме: • ГРИЛЬ (рекомендуется устанавливать только МАКС. температуру); Программа ТРАДИЦИОНАЛЬНАЯ ДУХОВКА Включаются два нагревательных элемента: нижний и верхний. В режиме традиционального приготовления
- Страница 18 из 25
RS Таблица приготовления Программы Традициона льная духовка Деликатная духовка Нагрев сверху Гриль Продукты Вес (кг) Уровень Время нагревания (мин.) Рекомендуемая температура Утка Утка аркое из телятины или говядины жаркое из свинины Печенье (песочное) Песочные торты Лазанья Баранина Скумбрия
- Страница 19 из 25
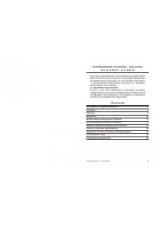
Предосторожности и рекомендации ! Изделие спроектировано и изготовлено в соответствии с международными нормативами по безопасности. Необходимо внимательно прочитать настоящие предупреждения, составленные в целях вашей безопасности. Общие требования к безопасности • Данное устройство является
- Страница 20 из 25
Техническое обслуживание и уход RS Отключение электропитания 3. возьмитесь за дверцу руками с двух сторон, плавно закроите ее, но не полностью. Затем потяните дверцу на себя, снимая ее со своего гнезда (см. схему). Для установки дверцы на место выполните вышеописанные операции в обратном порядке.
- Страница 21 из 25
Изделие: Торговая марка: RS Электрический духовой шкаф Торговый знак изготовителя: Модель: Изготовитель: Страна-изготовитель: Габаритные размеры духового шкафа / Объем: Номинальное значение напряжения электропитания или диапазон напряжения Условное обозначение рода электрического тока или
- Страница 22 из 25
RS 22
- Страница 23 из 25
RS 23
- Страница 24 из 25
05/2012 - 195102619.00 XEROX FABRIANO RS 24
- Страница 25 из 25