Инструкция для Indesit ISL 60 V
 1
1 2
2 3
3 4
4 5
5 6
6 7
7 8
8 9
9 10
10 11
11 12
12 13
13 14
14 15
15 16
16 17
17 18
18 19
19 20
20 21
21 22
22 23
23 24
24 25
25 26
26 27
27 28
28 29
29 30
30 31
31 32
32 33
33 34
34 35
35 36
36 37
37 38
38 39
39 40
40 41
41 42
42 43
43 44
44 45
45 46
46 47
47 48
48 49
49 50
50 51
51 52
52 53
53 54
54 55
55 56
56 57
57 58
58 59
59 60
60 61
61 62
62 63
63 64
64 65
65 66
66 67
67 68
68
Contents
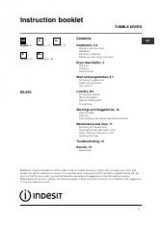
TUMBLE DRYER
ISL60V
Instruction booklet
Installation, 2-3
Where to put your dryer
Ventilation
Electrical connection
Before you start using your dryer
Dryer description, 4
The front
The back
Control panel
Start and programmes, 5-7
Choosing a programme
Table of programmes
The controls
Laundry, 8-9
Sorting your laundry
Wash care labels
Special clothing items
Drying times
Warnings and Suggestions, 10
General safety
Disposal
Saving energy and respecting the environment
Maintenance and Care, 11
Switching off the electricity
Cleaning the filter after each cycle
Check the drum after each cycle
Cleaning the dryer
Troubleshooting, 12
Service, 13
Spare parts
GB
English, 1
F
Français, 14
D
Deutsch, 27
E
Español, 40
NL
Nederlands, 53
GB
1
!
Keep this instruction booklet on hand in order to refer to it when necessary. Take it with you when you move, and
should you sell this appliance or pass it on to another party, make sure that this booklet is supplied along with the
dryer so that the new owner may be informed about warnings and suggestions on how the appliance works.
!
Read these instructions carefully; the following pages contain important information on installation and suggestions
on how the appliance works.
Оглавление инструкции
- Страница 1 из 69
Instruction booklet TUMBLE DRYER GB English, 1 E Español, 40 F Français, 14 NL D Deutsch, 27 Contents GB Installation, 2-3 Where to put your dryer Ventilation Electrical connection Before you start using your dryer Nederlands, 53 Dryer description, 4 The front The back Control panel Start and
- Страница 2 из 69
Installation GB Where to put your dryer Permanent venting Place your dryer at a distance from gas ranges, stoves, heaters, or cook tops because flames can damage the appliance. ● If you are going to install the Minimum gap 10mm appliance under a work counter, be sure to leave a 10mm space between
- Страница 3 из 69
Installation Open window venting ! Do not use extension cords. The end of the tube should be directed downwards, to prevent warm moist air from condensing in the room or in the dryer. GB ! The power cord must not be bent or squashed. ! The power supply cord should be checked periodically and
- Страница 4 из 69
Dryer Description GB The front The back Control Panel Model & Serial numbers Rating plate Drum Air Intake Vent Vent Tube fitted here Filter Caution: Hot! Control panel Progress or Delay Lights Programme Guide ON/OFF Button On/Off Light Options Buttons and Lights START/CANCEL Button The START/CANCEL
- Страница 5 из 69
Start and Programmes Choosing a programme 1. Plug the dryer into the electrical socket. 2. Sort your laundry according to fabric type (see Laundry). 3. Open the door and make sure the filter is clean and in place (see Maintenance). 4. Load the machine and make sure items are not in the way of the
- Страница 6 из 69
Start and Programmes GB Programmes ! If the On/Off light is not lit; Press the ON/OFF button and then select programme. Programme What it does... 1 Cottons Dries your clothes on High heat setting, ready for putting away 1. Position the PROGRAMME knob on 1. Options available: 2. Select any Options,
- Страница 7 из 69
Start and Programmes The Controls PROGRAMMES knob ● ! Warning, if after pressing the start button, the programmes knob position is changed, the new position will NOT change the programme selected. ! Position 0, turning the knob to position 0 resets and cancels a programme. ● OPTION buttons / lights
- Страница 8 из 69
Laundry GB Sorting your laundry Wash Care Labels Check symbols on clothing labels to make sure that the articles can be tumble dried. ● Sort laundry by fabric type. ● Empty pockets and check buttons. ● Close zippers and hooks and tie loose belts and strings. ● Wring out each item in order to
- Страница 9 из 69
Laundry Special clothing items Times are approximate and can vary depending upon: Blankets and Bedspreads: acrylic items (Acilan, Courtelle, Orion, Dralon) must be dried with special care on LOW heat setting. Avoid drying for a long period of time. ● ● Pleated or creased garments: read the
- Страница 10 из 69
Warnings and Suggestions GB ! The appliance has been designed and built according to international safety standards. These warnings are given for safety reasons and must be followed carefully. General safety ● ● ● ● ● ● ● ● ● ● ● ● ● ● ● ● ● ● ● ● This tumble dryer is not intended for use by
- Страница 11 из 69
Maintenance and Care Switching off the electricity Check the drum after each cycle Unplug your dryer when not using it, when cleaning it and during all maintenance operations. Turn the drum manually in order to remove small items (handkerchiefs) that could have been left behind. Clean the filter
- Страница 12 из 69
Troubleshooting GB One day your dryer seems not to be working. Before you call your Service Centre (see Service), go through the following troubleshooting suggestions: Problem: Possible causes / Solution: The tumble dryer won’t start. ● ● ● ● ● ● ● Drying cycle will not begin. ● Its taking a long
- Страница 13 из 69
Service Before calling the Service Centre: ● ● Use the troubleshooting guide to see if you can solve the problem yourself (see Troubleshooting). If not, turn off the dryer and call the Service Centre closest to you. What to tell the Service Centre: name, address and post code. ● telephone number. ●
- Страница 14 из 69
Notice d’utilisation et installation SÈCHE-LINGE F GB English, 1 E Español, 40 F Français, 14 NL D Deutsch, 27 Table des Matières Installation, 15-16 Où installer votre sèche-linge Ventilation Connexions électrique Avant de commencer à utiliser votre sèche-linge Nederlands, 53 Description du
- Страница 15 из 69
Installation Où installer votre sèche-linge Placez votre sèche-linge à une certaine distance des cuisinières, fourneaux, radiateurs, ou plaques de cuisson à gaz, car les flammes peuvent endommager cet appareil. ● Si vous installez cet appareil minimale espace 10mm sous un plan de travail, faites en
- Страница 16 из 69
Installation F Ventilation par fenêtre ouverte L’extrémité du tuyau doit être dirigée vers le bas, de manière à éviter que de l’air chaud humide se condense dans la pièce ou dans le sèche-linge. ! N’utilisez pas de rallonges. ! Le cordon d’alimentation ne doit pas être courbé ou écrasé. ! Le cordon
- Страница 17 из 69
Description du sèche-linge Vue de face Vue de l’arrière Panneau de commande Numéro du Modèle et Numéro de Série Plaque signalétique Tambour Tuyau de ventilation fixé ici Filtre Panneau de commandes F Orifice d’entrée d’air Attention: Chaud! Les témoins Progression ou Temporisation Témoin Filtre
- Страница 18 из 69
Démarrage et Programmes F Choisir un programme 1. 2. 3. 4. 5. 6. 7. 8. Branchez la fiche du sèche-linge dans la prise électrique. Triez votre linge en fonction du type de textiles (voir Linge). Ouvrez la porte et en vous assurant que le filtre soit propre et en place (voir Entretien). Chargez la
- Страница 19 из 69
Démarrage et Programmes Programmes ! Si le Voyant Marche/Arrêt n’est pas illuminé ; Appuyez sur le bouton MARCHE/ARRÊT ensuite le programme. Programme Ce qu’il fait... 1 Cotons 1. Positionnez le bouton des PROGRAMMES sur 1. Options disponibles: Sèche vos vêtements sur le réglage Température Élevée,
- Страница 20 из 69
Démarrage et Programmes F Les commandes Bouton des PROGRAMMES ● ! Attention, si après avoir enfoncé le bouton de départ, la position du bouton des programmes a changé, cette nouvelle position NE changera PAS le programme sélectionné. ! Position 0, le fait de tourner le bouton vers la position 0
- Страница 21 из 69
Linge Trier votre linge Étiquettes d’Entretien Vérifiez les symboles sur les étiquettes des vêtements pour vous assurer que les articles peuvent être passés au sèche-linge. ● Triez votre linge par type de textile. ● Videz les poches et vérifiez les boutons. ● Fermez les fermetures Éclair et les
- Страница 22 из 69
Linge F Vêtements spéciaux Ces temps sont approximatifs et peuvent varier en fonction des paramètres suivants : Les Couvertures et Dessus de lits : articles en acrylique (Acilan, Courtelle, Orion, Dralon) doivent être séchés avec des précautions particulières, à BASSE température. Évitez de les
- Страница 23 из 69
Avertissements et Suggestions ! Cet appareil a été conçu et construit conformément à des normes de sécurité internationales. Ces avertissements sont donnés pour des raisons de sécurité et doivent être suivis attentivement. Sécurité Générale ● ● ● ● ● ● ● ● ● ● ● ● ● ● ● ● ● ● ● ● ● Ce sèche-linge
- Страница 24 из 69
Entretien et Nettoyage F Éteignez l’électricité Nettoyage du tambour Débranchez votre sèche-linge lorsque vous ne l’utilisez pas, lorsque vous le nettoyez et durant toutes les opérations d’entretien. ! Pour nettoyer le tambour, ne pas utiliser d’abrasifs, de laine d’acier ni de produits de
- Страница 25 из 69
Que faire en cas de panne Votre sèche-linge semble ne pas fonctionner. Avant d’appeler votre Centre de Service d’Entretien (voir Service d’Entretien), passez en revue les suggestions de dépannage suivantes : Problème : Le sèche-linge ne démarre pas. Causes possibles / Solution : ● ● ● ● ● ● ● Le
- Страница 26 из 69
Service Après-Vente F Avant d’appeler le Centre de Service Après-Vente : ● ● Utilisez le guide de dépannage pour voir si vous pouvez résoudre le problème vous-même (voir Que faire en cas de panne). Si non, éteignez le sèche-linge et appelez le Centre de Service Après-Vente le plus proche. Quelles
- Страница 27 из 69
Bedienungsanleitung WÄSCHETROCKNER GB English, 1 E Español, 40 F Français, 14 NL D Deutsch, 27 Inhaltsverzeichnis D Installierung, 28-29 Aufstellung Ihres Wäschetrockners Belüftung Stromanschluss Vor der Inbetriebsetzung Ihres Wäschetrockners Nederlands, 53 Beschreibung Ihres Wäschetrockners, 30
- Страница 28 из 69
Installierung D Aufstellung des Wäschetrockners Den Wäschetrockner so aufstellen, dass ausreichend Abstand zu Gasherden, Öfen, Heizungen oder Kochplatten vorhanden ist, da das Geräte beschädigt werden könnte. ● Wird der Wäschetrockner Mindestabstand 10 mm untergebaut, muss zwischen der
- Страница 29 из 69
Installierung Entlüftung durch ein offenes Fenster Das Schlauchende sollte nach unten zeigen, um verhindern zu können, dass warme feuchte Luft im Raum oder Wäschetrockner kondensiert. ! Sicherstellen, dass eine ausreichende Belüftung für den Trockner bereit steht und dass das Schlauchende nicht die
- Страница 30 из 69
Beschreibung Ihres Wäschetrockners D Vorderseite Bedienblende Modell- & Seriennummer Rückseite Trommel Typenschild Belüftungsschlitze Anschluss für Abluftschlauch Filter Vorsicht,heiß! Bedienblende Programmphasen- oder Startzeitvorwahl-Leuchten Programmübersicht Die START/LÖSCH-Taste startet ein
- Страница 31 из 69
Start und Programme Programmauswahl 1. Den Wäschetrockner an die Steckdose anschließen. 2. Die Wäsche je nach Gewebeart sortieren (siehe Gewebeart). 3. Die Tür öffnen und sicherstellen, dass der Filter sauber ist und korrekt eingesetzt wurde (siehe Wartung). 4. Die Maschine beladen und dabei
- Страница 32 из 69
Start und Programme D Programme ! Wenn die Lampe EIN/AUS nicht leuchtet, die Taste EIN/AUS drücken und anschließend das Programm wählen. Programme Funktion Einstellung Hinweis: 1 Baumwolle Trocknet die Kleidung bei eingestellter hoher Temperatur. Die Wäsche kann anschließend im Schrank verstaut
- Страница 33 из 69
Start und Programme Die Bedielemente ● Hohe Temperatur ● Ist dieser Knopf vorhanden, kann damit eine höhere Temperatur eingestelllt werden. Wenn nach dem Drücken dieses Knopfes eine hohe Temperatureinstellung gewählt wird, leuchtet die Lampe über dem Knopf auf. Die automatische Voreinstellung für
- Страница 34 из 69
Gewebeart D Tipps zum Sortieren Ihrer Wäsche • Symbole auf den Etiketten überprüfen, um sicherstellen zu können, dass die entsprechenden Wäschestücke trocknergeeignet sind. • Die Wäsche nach Gewebearten sortieren. • Taschen leeren und Knöpfe überprüfen. • Reißverschlüsse und Haken schließen und
- Страница 35 из 69
Gewebeart Artikel, bei denen besondere Sorgfalt erforderlich ist Decken und Bettüberwürfe: Artikel aus Acrylfasern (Acilan, Courtelle, Orion, Dralon) müssen vorsichtig bei NIEDRIGER Temperatur getrocknet werden. Außerdem dürfen solche Artikel nicht zu lange getrocknet werden. Kleidungsstücke mit
- Страница 36 из 69
Warnhinweise und Empfehlungen D ! Diese Maschine wurde gemäß internationaler Sicherheitsnormen entworfen und hergestellt. Die Warnhinweise dienen Ihrer Sicherheit und müssen unbedingt befolgt werden. Allgemeine Sicherheitshinweise ● ● ● ● ● ● ● ● ● ● ● ● ● ● ● ● ● ● ● ● ● 36 Dieser Wäschetrockner
- Страница 37 из 69
Wartung und Pflege Stromversorgung abschalten Trommelreinigung Den Trockner bei Nichtverwendung, während der Reinigung und allen Wartungsarbeiten vom Stromnetz trennen. ! Keine Scheuermittel, Stahlwolle oder Edelstahlreiniger zum Säubern der Trommel verwenden. Filter nach jedem Zyklus reinigen Der
- Страница 38 из 69
Fehlersuche D Bei einer Gerätestörung bitte zunächst folgende, mögliche Ursachen überprüfen, bevor Sie sich an unseren autorisierten Kundendienst werden: Problem: Mögliche Ursache / Lösung: Trockner startet nicht. ● ● ● ● ● ● ● Trocknungszyklus startet nicht. Wäsche trocknet nur langsam. ● ● ● ● ●
- Страница 39 из 69
Kundendienst Bevor Sie den autorisierten Kundendienst anrufen: ● ● Versuchen Sie, mit Hilfe der Fehlersuchtabelle das Problem selbst zu lösen (siehe Fehlersuche). Falls Sie das Problem nicht selbst lösen können, schalten Sie den Trockner aus und rufen Sie den Kundendienst in Ihrer Nähe an.
- Страница 40 из 69
Folleto de instrucciones SECADORA E GB English, 1 E Español, 40 F Français, 14 NL D Deutsch, 27 Índice de materias Instalación, 41-42 Dónde instalar la secadora Ventilación Conexiones eléctrica Antes de empezar a utilizar la secadora Nederlands, 53 Descripción de la secadora, 43 La sección
- Страница 41 из 69
Instalación Dónde instalar la secadora Instale la secadora lejos de estufas, calentadores o cocinas, ya que las llamas pueden dañar el electrodoméstico. ● Si va a instalar el espacio mínima 10mm electrodoméstico debajo de una encimera, asegúrese de dejar un espacio de 10 mm entre la parte superior
- Страница 42 из 69
Instalación E Ventilación mediante una ventana abierta El extremo del tubo debe orientarse hacia abajo, a fin de evitar que el aire húmedo y caliente se condense en la habitación o en la secadora. ¡Compruebe que la secadora tenga la ventilación adecuada y que el extremo del tubo de ventilación no
- Страница 43 из 69
Descripción de la secadora La sección delantera Panel de control Modelo y número de serie La sección trasera Drum Matrícula E Respiradero de entrada de aire Tubo de ventilación ajustado aquí Filtro Precaución: Caliente Panel de control luces de Estado o Tiempo de Retardo Guía de Programas El botón
- Страница 44 из 69
Comienzo y Programas E Seleccionar un programa 1. 2. 3. 4. 5. 6. 7. 8. 9. Enchufar la secadora a la toma eléctrica. Clasifique la colada según la clase de tejido (véase La colada). Abra la puerta y asegúrese que el filtro está limpio y en posición (véase Mantenimiento). Cargue la máquina y
- Страница 45 из 69
Comienzo y Programas Programas E ! Si la luz de Encendido/Apagado no está encendida, pulse el botón de ENCENDIDO/APAGADO continuación, seleccione el programa. y, a Programa Qué hace... Qué programa... Nota: 1 Algodón Seca la ropa con el ajuste Mucho calor, dejándolas listas para usar. 1. Sitúe el
- Страница 46 из 69
Comienzo y Programas E Controles PROGRAMADOR ! Advertencia: si tras pulsar el botón de INICIO se cambia la posición del programador, la nueva posición NO MODIFICARÁ el programa seleccionado. ! Posición 0: al situar el programador en la posición 0 se restablece y se cancela un programa. ●
- Страница 47 из 69
La colada Etiquetas de recomendaciones durante el lavado de la ropa Clasificar la colada • Compruebe los símbolos en las etiquetas de la ropa a fin de asegurar que los artículos pueden secarse con calor. • Clasificar la colada por tipo de tejido. • Vaciar los bolsillos y comprobar los botones. •
- Страница 48 из 69
La colada E Prendas especiales Los tiempos son aproximados y pueden variar dependiendo de: Mantas y sobrecamas: Los artículos acrílicos (Acilan, Courtelle, Orion, Dralón) deben secarse teniendo especial cuidado y en ajuste POCO calor. Evite secarlos durante mucho tiempo. Prendas plisadas o
- Страница 49 из 69
Advertencias y recomendaciones ¡ El electrodoméstico ha sido diseñado y fabricado según las normas internacionales de seguridad. Por razones de seguridad le comunicamos las siguientes advertencias. Por favor, léalas con atención. Seguridad general ● ● ● ● ● ● ● ● ● ● ● ● ● ● ● ● ● ● ● ● ● Esta
- Страница 50 из 69
Mantenimiento y cuidados E Desconectar la electricidad Limpieza del tambor Desenchufe la secadora mientras no la esté utilizando, cuando la limpie y durante los trabajos de mantenimiento. ¡ No utilice productos de limpieza abrasivos, lana de acero o acero inoxidable para limpiar el tambor. Limpiar
- Страница 51 из 69
Resolución de problemas Si un día la secadora deja de funcionar. Antes de llamar al Centro de Servicio Técnico (véase Servicio), realice las siguientes comprobaciones: Problema: La secadora no se pone en marcha. Posibles causas / Solución: ● ● ● ● ● ● ● No comienza el ciclo de secado. Tarda mucho
- Страница 52 из 69
Servicio E Antes de llamar al centro de servicio técnico: ● ● Utilice la guía de resolución de problemas para ver si puede resolver el problema usted mismo (véase Resolución de problemas). Si no es así, desconecte la secadora y llame al Centro de servicio técnico más cercano. Piezas de repuesto
- Страница 53 из 69
Gebruiksaanwijzing DROOGAUTOMAAT GB English, 1 E Español, 40 F Français, 14 NL D Deutsch, 27 Inhoud NL Installatie, 54-55 Het plaatsen van de droger Ventilatie Elektrische aansluitingen Voor het eerste gebruik van de droger Nederlands, 53 Beschrijving van de droogautomaat, 56 De voorkant De
- Страница 54 из 69
Installatie NL Het plaatsen van de droogautomaat Plaats de droogautomaat op voldoende afstand van uw gasfornuis, kachel, verwarming of gasstel; vlammen kunnen schade toebrengen aan het apparaat. ● Als u het apparaat onder een Minimale spleet 10mm werkblad wilt plaatsen, zorg er dan voor dat er
- Страница 55 из 69
Installatie Luchtafvoer door een open raam Het uiteinde van de buis moet naar beneden worden gericht om te voorkomen dat warme, vochtige lucht condenseert in de kamer of in de droogautomaat. ! Zorg ervoor dat de droger voldoende geventileerd wordt en dat het uiteinde van de buis niet naar de
- Страница 56 из 69
Beschrijving van de droogautomaat NL De voorkant Bedieningspaneel Model- en serienummers De achterkant Trommel Typeplaatje Pluizenfilter Luchtinvoeropening Waarschuwing: Heet Luchtafvoerbuis hier plaatsen Bedieningspaneel filter reinigen lampje Optie toets en lampjes Programmagids Programmaverloop
- Страница 57 из 69
Start en programma’s Een programma kiezen 1. 2. 3. 4. 5. 6. 7. 8. Steek de stekker van de droogtrommel in het stopcontact. Sorteer het wasgoed op stofsoort (zie Wasgoed). Doe de deur open en zorg ervoor dat het pluizenfilter schoon is en op zijn plaats zit (zie Reiniging en Onderhoud). Vul de
- Страница 58 из 69
Start en programma’s NL Programma’s ! Als het Aan/Uit lampje niet brand; Druk op de AAN/UIT toets en selecteer vervolgens het programma. Programma Wat het doet... 1 Katoen Droogt uw kleding op hoge temperatuur, zodat ze daarna in de kast gelegd kan worden. 1. Zet de PROGRAMMA keuzeschakelaar op 1.
- Страница 59 из 69
Start en programma’s De Bedieningen ● PROGRAMMA keuzeschakelaar ! Waarschuwing, als de positie van de programma keuzeschakelaar na het indrukken van de START toets is veranderd, verandert de nieuwe positie het geselecteerde programma NIET. ! Positie 0, als u de keuzeschakelaar naar de 0 draait,
- Страница 60 из 69
Wasgoed NL Het wasgoed sorteren Droogsymbolen • Controleer de droogsymbolen om te zien of de artikelen in de droogtrommel gedroogd kunnen worden. • Sorteer het wasgoed per stofsoort. • Leeg de zakken en controleer de knopen. • Sluit ritsen en haakjes en bind losse riemen en ceinturen vast. • Wring
- Страница 61 из 69
Wasgoed Speciaal wasgoed Deze tijden zijn richtlijnen en zijn afhankelijk van: Dekens en spreien: artikelen van acryl (Acilan, Courtelle, Orion, Dralen) moeten voorzichtig gedroogd worden op LAGE. Droog ze niet te lang. • Hoeveelheid water die zich na het centrifugeren nog in de kleding bevindt:
- Страница 62 из 69
Veiligheidsinstructies en waarschuwingen NL ! Het apparaat voldoet aan internationale veiligheidsvoorschriften. Deze waarschuwingen zijn bedoeld voor uw veiligheid en moeten strikt worden opgevolgd. Algemene veiligheidsinstructies ● ● ● ● ● ● ● ● ● ● ● ● ● ● ● ● ● ● ● ● ● 62 Deze droger mag niet
- Страница 63 из 69
Reiniging en onderhoud Haal de stekker uit het stopcontact Trommel reinigen Haal de stekker uit het stopcontact als u het apparaat niet gebruikt, tijdens het schoonmaken ervan en tijdens elk onderhoud. ! Gebruik geen schuurmiddelen, staalwol of reinigingsmiddelen voor roestvrij staal om de trommel
- Страница 64 из 69
Problemen oplossen NL Mocht u problemen ondervinden met uw droger controleer dan eerst het volgende voor u de technische dienst belt (zie Technische dienst): Probleem: Mogelijke oorzaken / Oplossing Droger start niet. ● ● ● ● ● ● ● Droogcyclus start niet. Het duurt lang voor het wasgoed droog is. ●
- Страница 65 из 69
Technische dienst Voor u de technische dienst belt: ● ● gebruik de tabel van het onderdeel problemen oplossen om te zien of u het probleem zelf kunt verhelpen (zie Problemen oplossen). Zo niet, zet de droger uit en bel de dichtstbijzijnde technische dienst. Informatie die de technische dienst nodig
- Страница 66 из 69
- Страница 67 из 69
- Страница 68 из 69
195044879.05W 07/2007 - SIMLEX . Four Ashes, Wolverhampton
- Страница 69 из 69